367MC – Critical Rationale

367MC – Critical Rationale

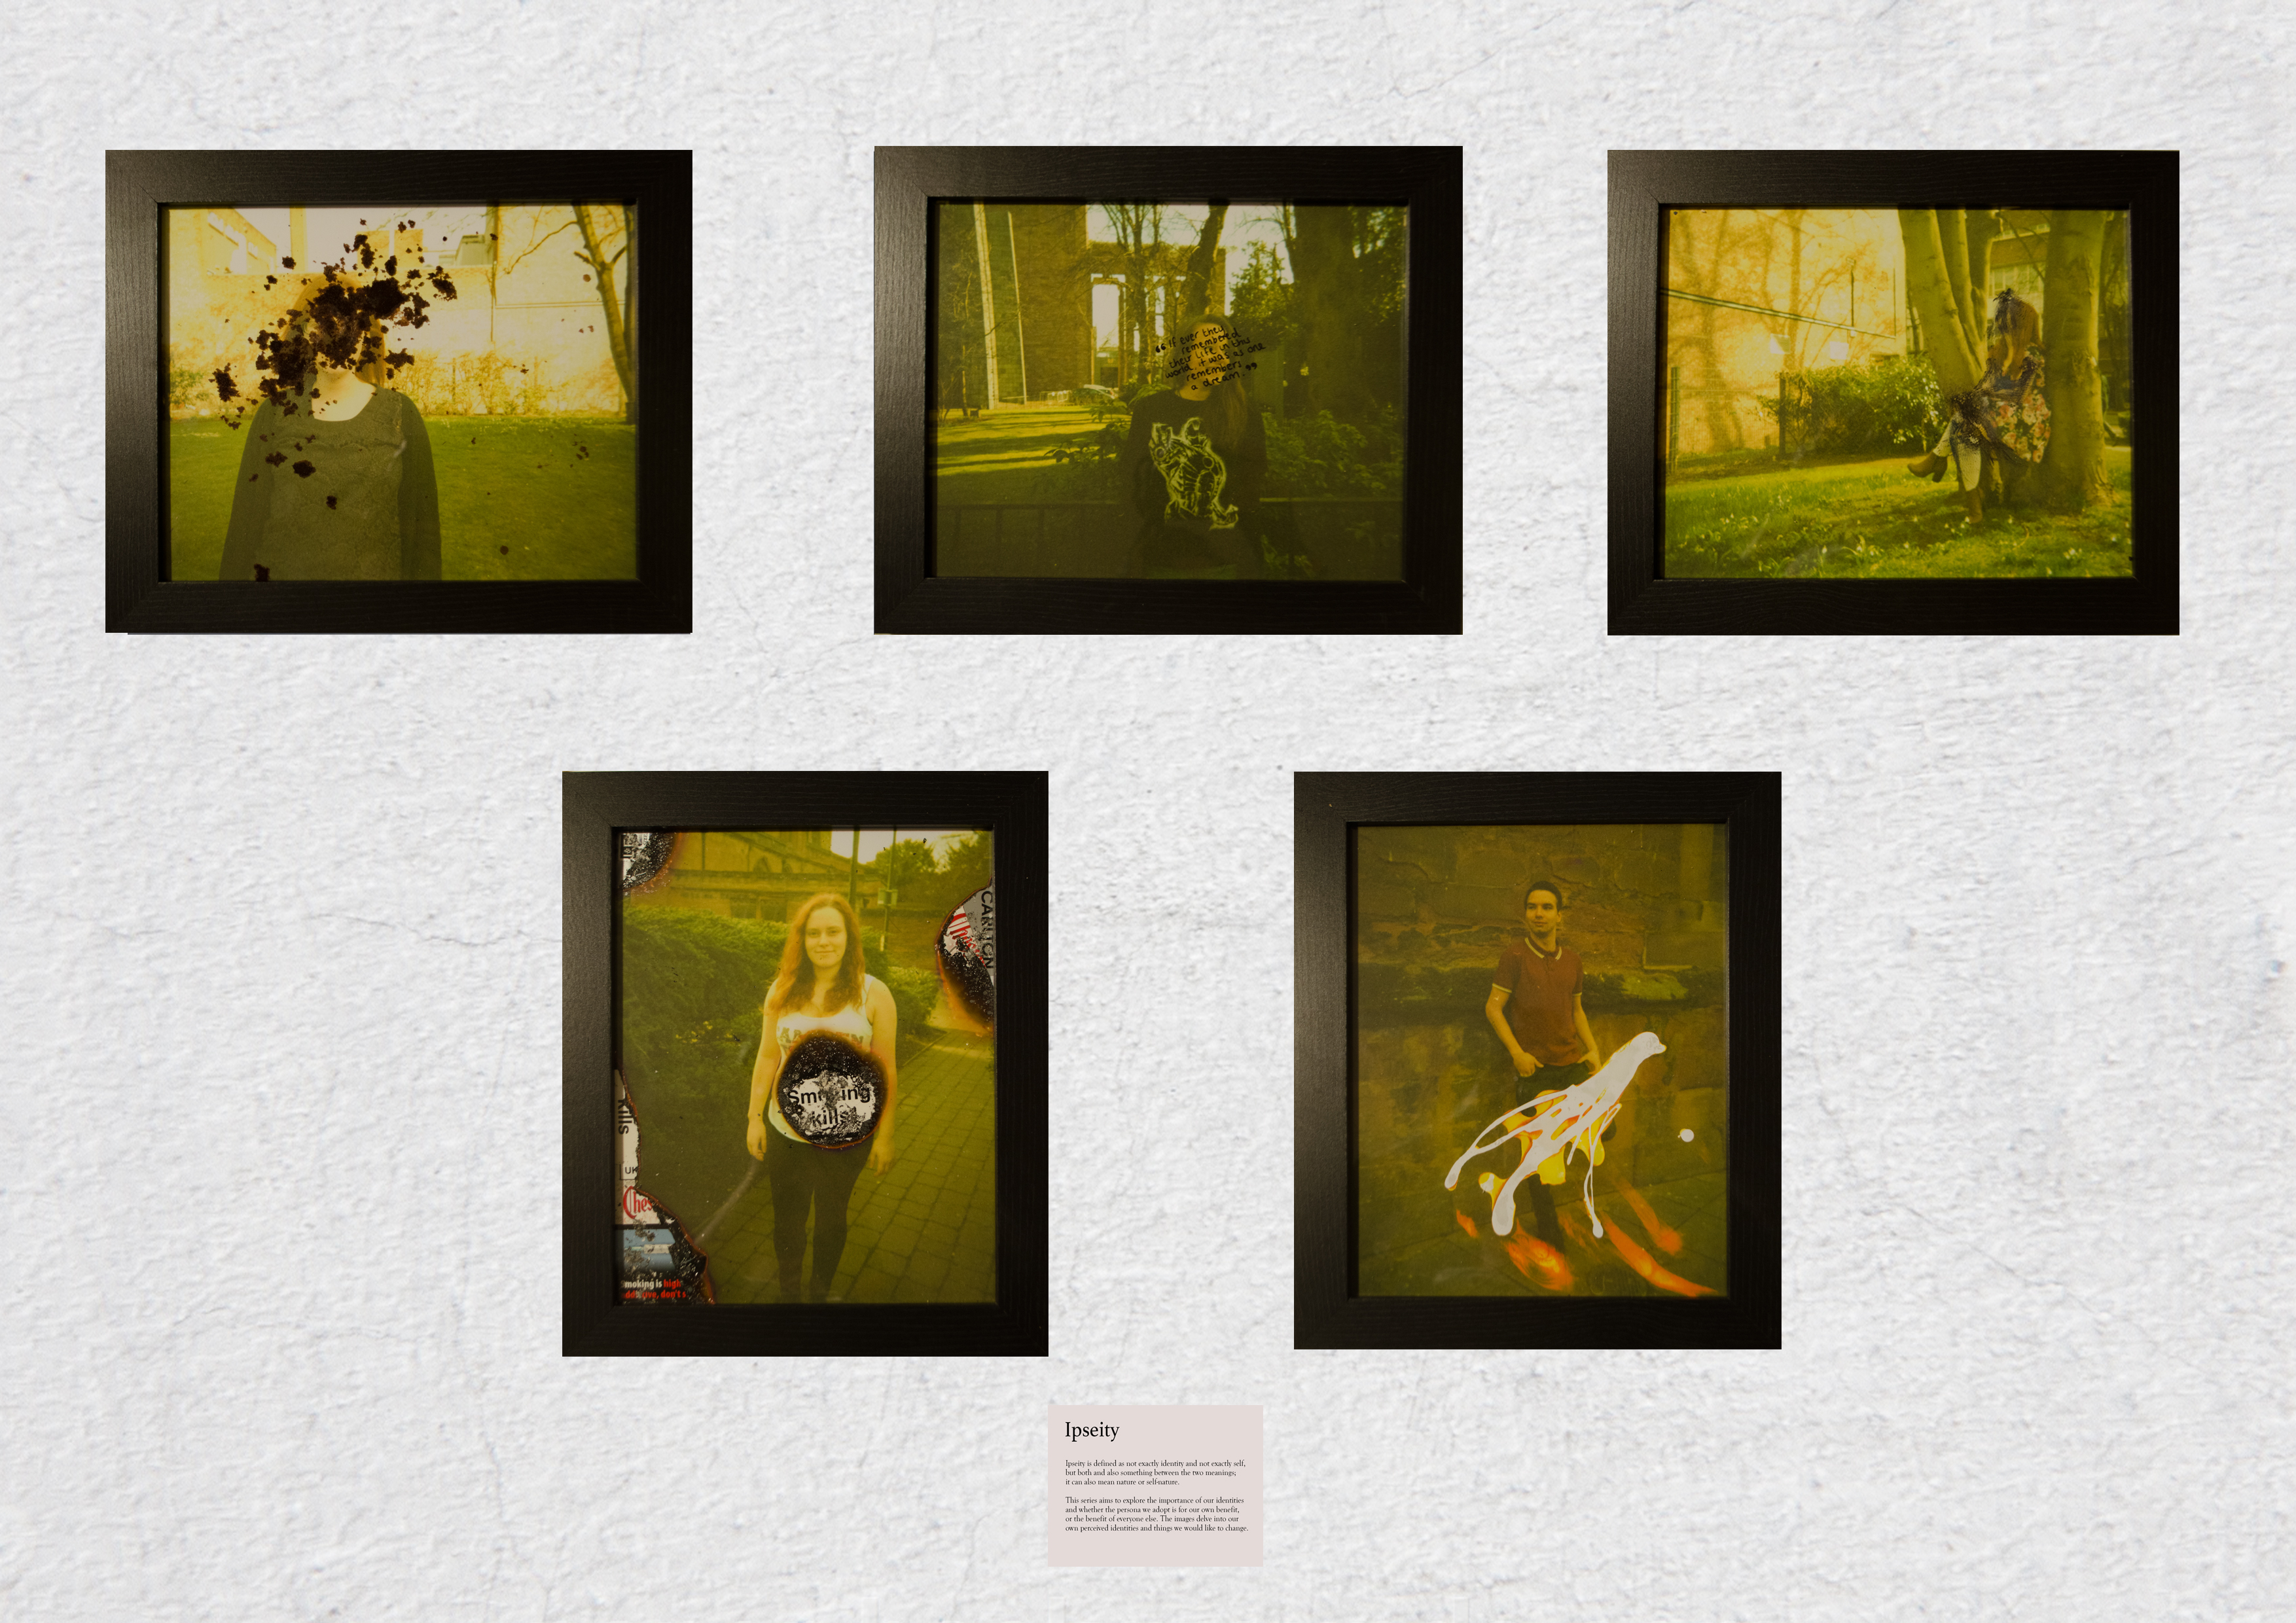
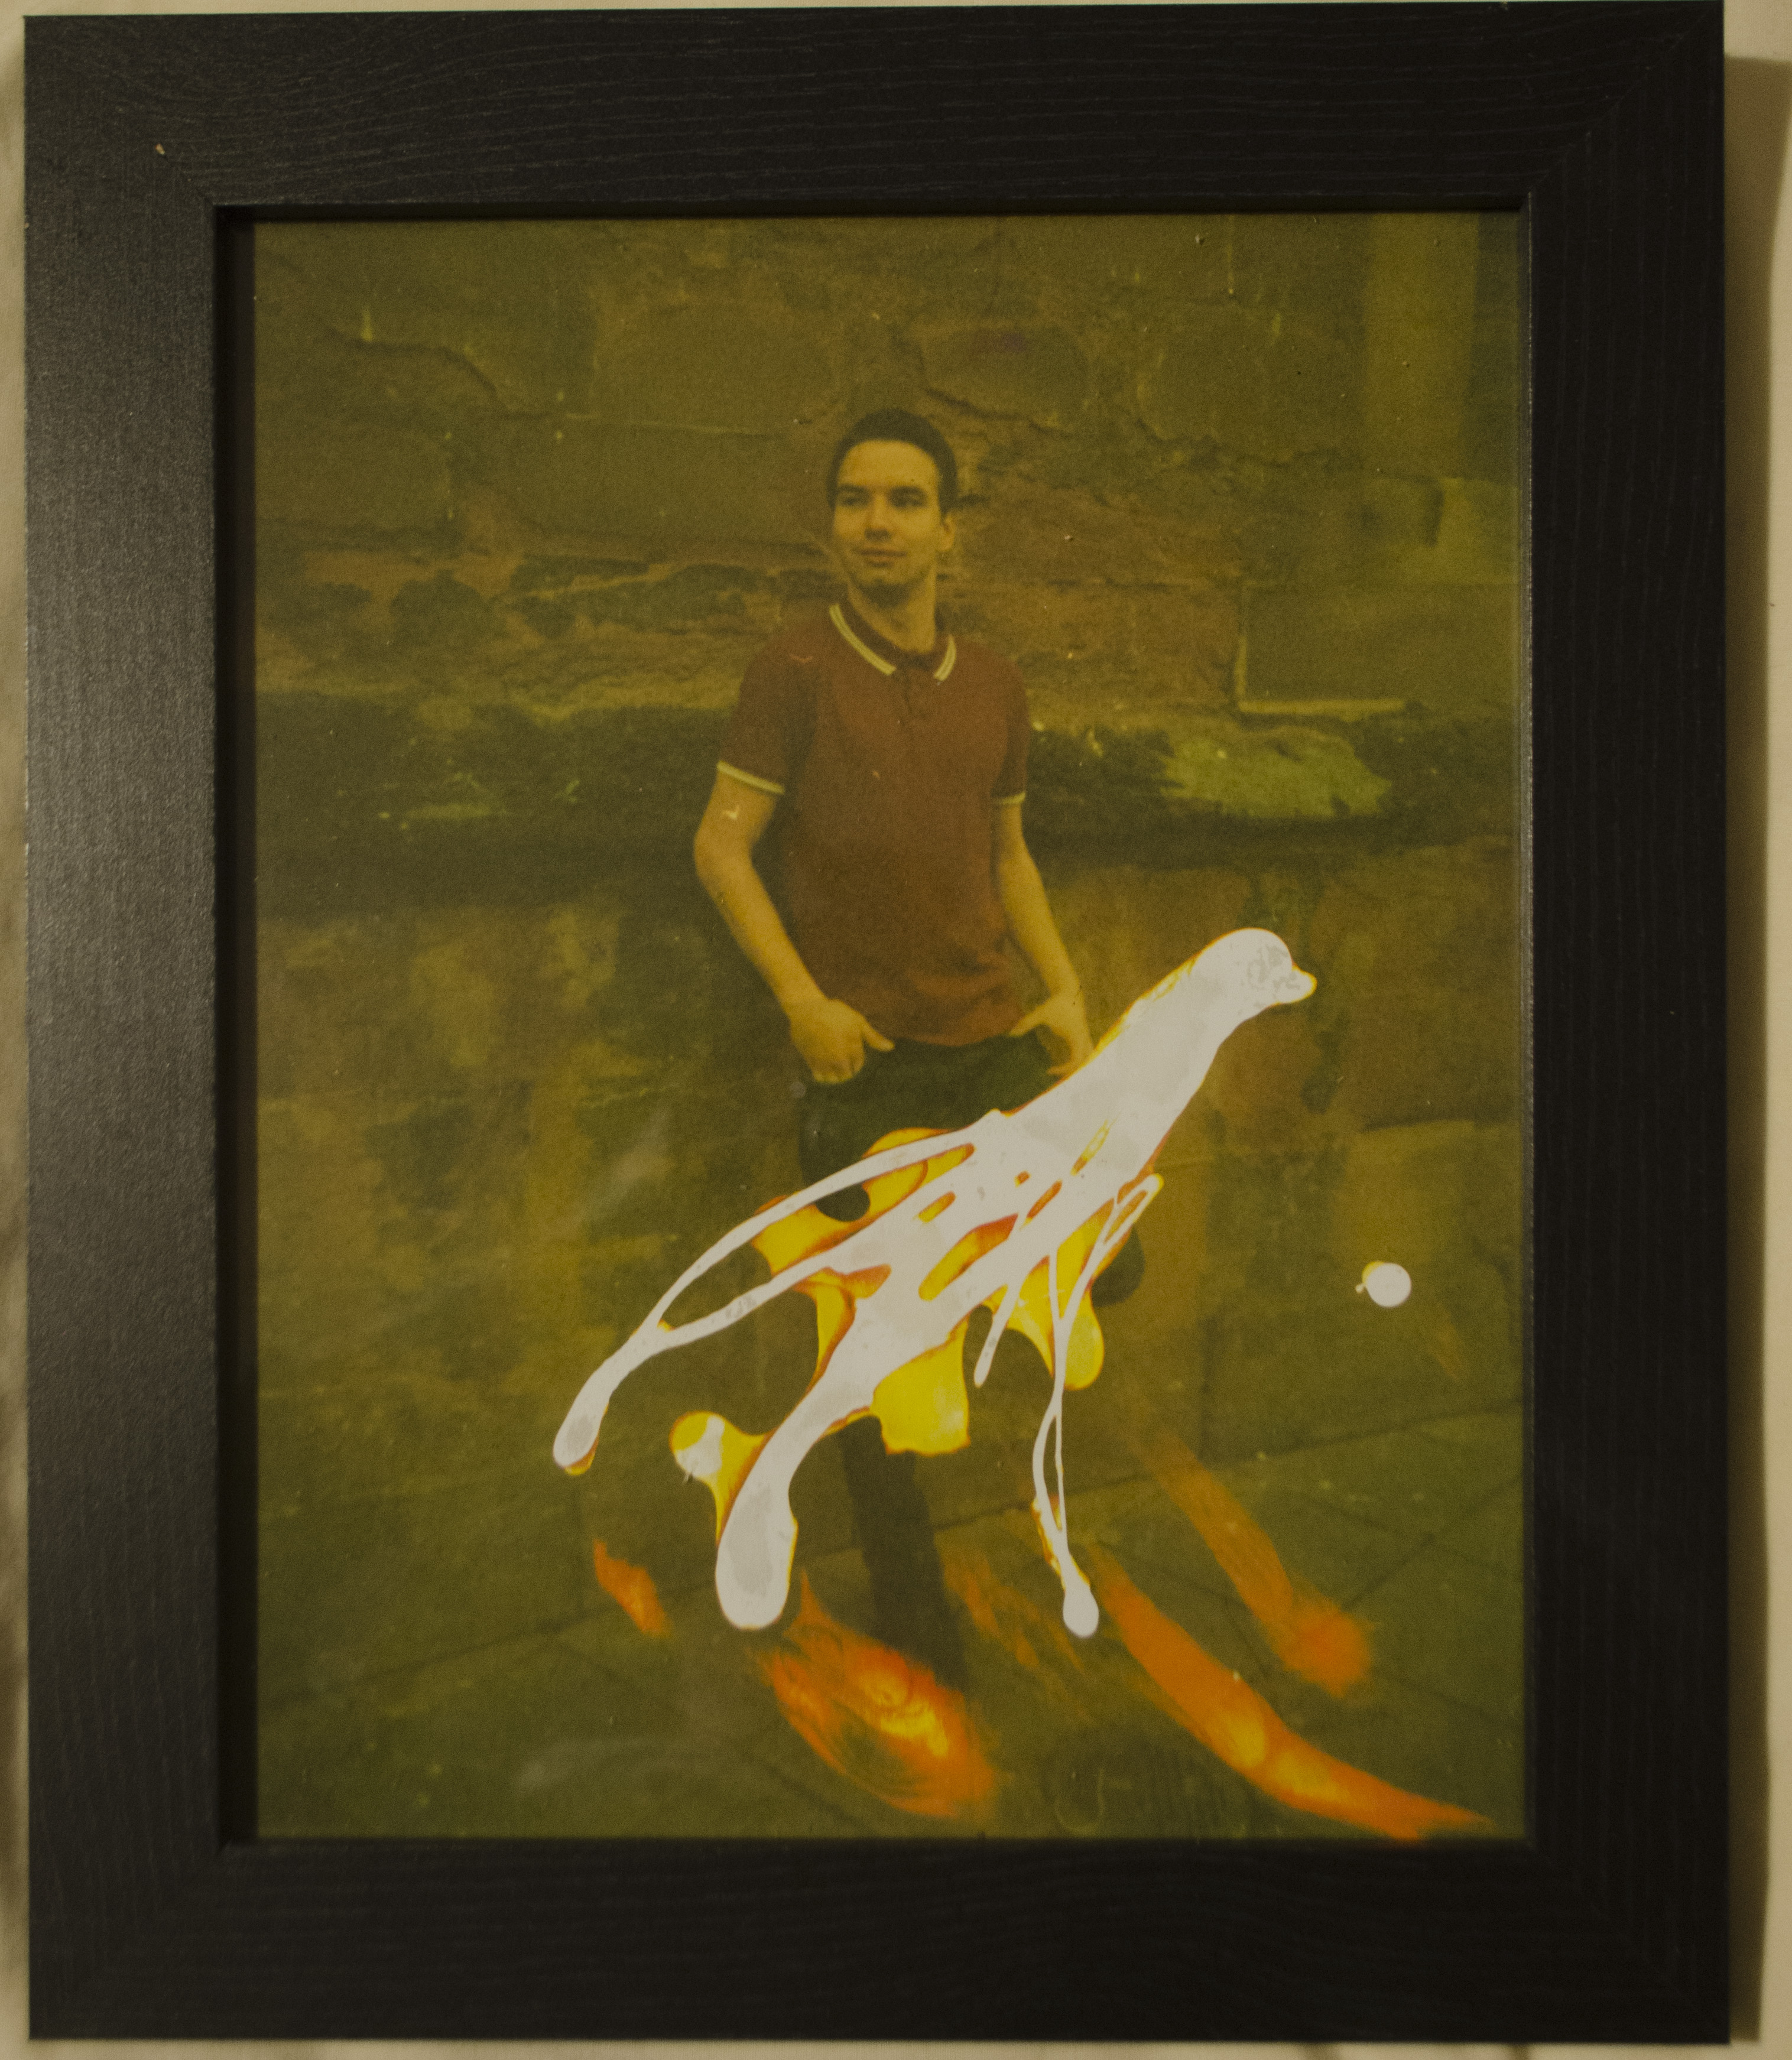
My project “Retouch” is respondent to the ongoing issue of the media’s influence on body image through the manipulation of models. Although it is not such an obtrusive issue in the public eye, the discussion surrounding the implications of such images is becoming more prominent, and there has been a noticeable increase in the media’s coverage of the issue, including TV shows, radio segments and news reports. I wanted to demonstrate how easily an image can be altered and the frequency with which it occurs, but moreover, how often it influences a person’s self-perception. I researched the surrounding discussion on the topic and used my research paper to form the basis of my knowledge for this body of work.

The title of the project was determined through the creation of my satirical magazine cover. I used magazines such as Vogue for my inspiration, as they form the basis of the images I’m trying to replicate. I decided to use article teasers on the front cover to portray the concept, so that audience members can slowly come to the realisation that what they’re seeing isn’t a regular magazine cover, but that the process they’re witnessing is a regular reoccurrence, which will change their understanding of the piece.

I chose to experiment more with this than my previous projects, so I decided to work with video. I have never used video before so it was difficult to incorporate the production time into my schedule and I also had to consider the benefits of video over imagery to explore what footage could convey that images couldn’t. Based on the conceptual value of the footage, I decided that before and after compilation images weren’t enough to convey my concept, so I created time lapses to make the audience aware of all the manipulation that occurs before an image is published.

The presentation method of the piece was designed to have the biggest impact possible, to replicate the impact that these manipulated images have on body image perceptions. I chose to display the piece at A0 size so it would be indisputable to the viewer of the issues the piece is addressing. I have hung the piece with sticky foam pads because nails or pins would distract from the idea that it is a magazine cover, so I wanted a hanging method that was discrete.

The body of work exemplifies an ongoing issue within the digital age; the argument surrounding whether tools like photoshop are at fault, or whether it is the industry to blame? I feel that overall, the work functions well in relation to the audience and context for which it was created. The piece coherently demonstrates the themes and the underlying message through the use of satire and exposition. People who have never witnessed this type of manipulation before will be subject to a new experience and realisation, and for those who have seen it before, it will only reinforce the nature of the problem.

366MC Bibliography

366MC Bibliography

Cohen, M., Aletti, V., Dufour, D. and Barral, X. (2013). Mark Cohen. Paris: Éditions Xavier Barral.

Design Freebie, (2015). Best Dispersion Photoshop Action Collection. [online] Available at: http://www.designfreebie.com/best-dispersion-photoshop-action-collection/ [Accessed 14 Oct. 2015].

Google.co.uk, (n.d.). fairy tale book covers – Google Search. [online] Available at: https://www.google.co.uk/search?q=fairy+tale+book+covers&espv=2&biw=1280&bih=728&source=lnms&tbm=isch&sa=X&ved=0ahUKEwiTy5vRubjJAhWMcBoKHbQ6DX0Q_AUIBigB#imgrc=Osc7xZDHJPm0PM%3A [Accessed 30 Nov. 2015].

Gregson, T. (n.d.). Chasers of the light.

He, A. (2015). Ann He – home. [online] Ann He. Available at: http://www.annhe.com/ [Accessed 30 Nov. 2015].

Hess, G. (2004). 10 Greatest Love Poems of All Time. [online] Poem of Quotes: Read, Write, Learn. Available at: http://www.poemofquotes.com/articles/greatest-love-poems.php [Accessed 30 Nov. 2015].

How to Add and Remove Fog in Photoshop. (2015). Youtube: Phlearn – Aaron Nace.

Hughes, T. (1998). Birthday letters. New York: Farrar, Straus, Giroux.

Kay, S. and Janowitz, S. (2011). B. [Dobbs Ferry, NY?]: Do You Zoom.

Keesmaat, W. (2013). He who wants fire must be able to bear smoke. [Den Haag]: Contentement.

Koyczan, S. (2014). A Bruise on Light. Canada: Stickboy Press.

Laricchia, L. (n.d.). Lissy Laricchia. [online] Flickr – Photo Sharing!. Available at: https://www.flickr.com/photos/lissyl/ [Accessed 30 Nov. 2015].

Ledare, L. (2008). Pretend you’re actually alive. [New York?]: PPP Editions, in association with Andrew Roth Inc.

Millennium V. (2012). London: Park Communications.

Pattison, J. (n.d.). JENNIFER PATTISON – Projects. [online] Jennifer-pattison.com. Available at: http://www.jennifer-pattison.com/projects [Accessed 14 Oct. 2015].

Pinterest.com, (n.d.). Imagination. [online] Available at: https://www.pinterest.com/explore/imagination/ [Accessed 30 Nov. 2015].

Soth, A. (n.d.). Songbook.

Spanos, A. (n.d.). Harry Potter.. [online] Flickr – Photo Sharing!. Available at: https://www.flickr.com/photos/amyspanos365/albums/72157641732831423 [Accessed 30 Nov. 2015].

Studysomething.org, (n.d.). Photoshop Tutorials Photoshop Splatter / Dispersion Photomanipulation Tutorial(Atoz). [online] Available at: http://www.studysomething.org/photoshop-tutorials-photoshop-splatter-dispersion-photomanipulation-tutorialatoz_8ba960704.html [Accessed 14 Oct. 2015].

Walker, T. (n.d.). Tim Walker Photography. [online] Timwalkerphotography.com. Available at: http://www.timwalkerphotography.com/ [Accessed 30 Nov. 2015].

Wood, T. (1989). Looking for love. Manchester: Cornerhouse.
Independent Practice: Exploration – Critical Rationale

Independent Practice: Exploration – Critical Rationale

Where Yesterdays Live is a collation of images that have been produced alongside poetry in order to tell the story of love and loss. The book begins the story in the midst of a relationship and quickly depicts the relationship falling apart. The images have been partnered with certain pieces in order to enhance what the writing says within the canon of the book. Everything has a reason for it’s placement and each individual image tells its own story as well as contributing to the overall story throughout the piece. The title itself even captures the story in just a few simple words as it suggests that the book is travelling to a place of yesterday where the memories are stored and where the person you know/miss can’t be reached.

It has been designed to be reminiscent of a literature book, such as a romantic novel, in order to contrast and enhance the theme throughout the content. By creating a romantic subtle cover for the book, it continues to add to the momentum of the story. It also places the story within the two ends, showing that every story must end in some way or another. The design of the cover is made to look like a potential love letter that has had stuff spilled on or someone crying over it. However it was supposed to be subtle in order to make people wonder what the book is about.

The book itself would probably be displayed less as an exhibition piece and more as a book shop item. It’s something that would be bought by the masses that people could relate to. However, because it’s a poetry/photography book it would appeal to a specific type of audience and would therefore need to be found appealing by more than just creative people and/or writers. This is why it is fairly short and has the images in between, to entice people in different ways and to keep things interesting and unexpected.

The binding of the book is relative to the overall meaning. It has been bound by hand in order to add to the loving nature that the book is capturing in its essence. Despite the book being about love loss, the binding wanted to be something that could hold it together as delicately as the mind gets held together after losing someone you care about. Also, with the amount of effort that went into creating the book itself, it needed something more delicate to hold it all together.

Whether it be friends, relatives, lovers or anything else you have an emotional attachment to, the book reaches out to you in an attempt to console you, but also to convey the feelings you may not have known you had. That’s something that the book does well. Despite featuring a protagonist image, the rest of the images become something you can engage with in terms of sympathy or empathy.

Between the words and the images, this book is really apparent as to the feelings it expresses and how it considers the reader in its narrative.

Exhibition Planning

Exhibition Planning

Within the brief it stated that our final pieces had to be exhibition ready, which means we had to have full sized prints, framed and we have to know for definite how we wanted them displayed.

Each of my prints is 8×10 in size and they’re each framed in a medium thickness black wooden frame. I originally had 6 images, so it would have been 3 above and 3 below, but because I had to remove George I changed it to be displayed like this:

exhibition plan

In a way, it worked out slightly better, as it meant I could have the landscape and portrait images together without worrying about having to pick a final portrait image to fit the display.

I want them displayed at roughly eye level so that you don’t have to strain to see the images. I would like the persons eye line to fall in the centre of all 5 images, so that you could see all 5 images equally. Each image would be spaced 3 inches apart, with the top and bottom row being 3 inches apart too.

The reason I have chosen to display them like this is because I wanted them all as separate prints to reflect the notion that everyone has their own separate identity, but as I mentioned in my idea development, identity only becomes relevant when compared to others. This is why they’re next to each other, but still separated.

I have titled my work Ipseity. I originally planned on calling it identity, but I felt that was too simple and didn’t properly reflect my idea. So I put identity into a thesaurus, and it came up with ipseity. Ipseity is defined as not exactly identity and not exactly self, but both and also something between the two meanings; it can also mean nature or self-nature.” I thought this definition was a perfect explanation of my work. For my work I would like to have a contact card underneath my prints which is a short explanation of my project/title:

Exhibition card

Final Images

Final Images

DSC_4793

Libby:

“Jewellery or make up represents my personality.”
“I don’t like my skin.”

DSC_4794

Sophie:

“I do like food.”
“I don’t like that I have to wear my glasses to feel ‘normal’ or ‘myself’.”

DSC_4795

Emily:

“I like that I am Creative/I like writing and books.”
“I have a massive nose and forehead.”

DSC_4796

Suzie:

“My smoking.”
“I don’t like my stomach, but my hair is annoying sometimes too.”

DSC_4798

Tom:

“I hate cleaning”
“I’d say that it’s one thing being good at football and squash, and being able to act and sing, but I really wish I could dance :(“

Damaging Process

Damaging Process

This was the part of my work that I had been really looking forward to, but also the part that I needed to actually create the narrative I’d been aiming for.

I started out by practicing on some 6×4 shots so I could get the technique right for the final images.

All

Each of the images is being damaged according to the person’s answers about their identity.

Emily

Emily’s was damaged with writing as she said she loves writing and books. In addition to this I asked her what her favourite book was and she said “The Lion, the Witch and the Wardrobe” by C.S. Lewis. I needed to test out how would be best to write on the image since I wanted it to be destructive, but also neat enough to read. it also had to be positioned over her face since she said she has “a massive nose and forehead.” I tested out different pens to see which one would write on the odd texture and found that the pen used across her face in the middle was the best one as it was bold enough to be seen and wrote easily on the image itself. I was torn between two quotes from the book, but ended up deciding on “If ever they remembered their life in this world it was as one remembers a dream.” Nothing too long, and sums up the book perfectly. On the actual image there will only be one piece of writing because if I add writing anywhere else other than her face, it won’t represent the truth of her answer.

Libby

Libby’s was damaged with make up as she said either make up or jewellery represent her identity. I needed to test the best type of make up to use for this one since a lot of it wouldn’t stay imprinted on the image. I used liquid eyeliner across her face, but that dried very quickly because of the matt finish on the photos. I tested mascara across her body and added eye shadow over the top to enhance it and this worked rather well as the eye shadow stuck to the mascara, making it bolder. I also tried out regular eye liner with eye shadow over it, however this was a little too thick for my liking and it looked too neat for what I wanted to achieve so I went with the mascara. The damaged area in Libby’s photograph will be the area over her skin as that’s what she said she disliked.

Sophie

Sophie’s image has been damaged with food. This one was a lot easier to create because all I had to do was find a food that would stick to the image. I eventually chose chocolate cake because one of her favourite foods is chocolate cake. It stuck to the image well and meant that also I could position it across her face where it needed to be since she doesn’t like having to wear glasses to feel normal.

Suzie

Suzie’s image was burnt with a lighter since she smokes. This one took a while to do because during the process it was really windy and the image wouldn’t catch fire. Also, we had to burn the back of the image because the ink on the front wouldn’t catch fire. When we burnt the middle, the ink blew up into a bubble then deflated and caught fire. It was a very awesome effect.

Tom

Tom’s was by far the most difficult one out of all of them. I had to damage his legs since his dislike was that he can’t dance, and I thought this image was going to be the easiest, but apparently not. Originally, I was attempting to damage it with alcohol, but the substance wasn’t strong enough to actually change the photo in any way. So I tried nail varnish remover since that has alcohol in it, and that did nothing either. I then tried pure acetone, but all that did was ever so slightly discolour it and it wasn’t even visible in some light. So I then poured Jäger on it as it’s a dark alcohol which I thought would work, but once again it only stained it a little. I tired de-icer with alcohol in it and literally nothing happened. I tried scratching the image with bottle tops from beers, but it didn’t give me the effect I wanted. I tried both wine and raspberry Sourz; but nothing. I tried everything except pure ethanol and that’s only because I couldn’t find any. So at this point I had to rethink Tom’s image. I decided to ask him for something different as it wasn’t working and after a while of thinking he said “I hate cleaning.” That’s when I had the perfect idea to use bleach. I knew bleach would work instantly so I tested it and it worked like a charm.

Overall, despite the issues I had with Tom’s, I’d say what I’ve created are some really good ideas. Now all that’s left is to damage the big ones and I should have my final pieces.

Enlarging Process

Enlarging Process

Originally in my project idea, I wanted to work with film so that I could damage the film then experiment with enlarging the images, to see the difference between film damage and print damage. I knew the potential issues with shooting on colour film and enlarging to black to and white paper, but I was interested to see what results I would get.

I began with cutting a small sheet of photo paper into strips to do test strips of the timings. I did each exposure at 2 seconds so the timing accumulated along the strip:

Tom Enlarged7

However, the results I got were barely visible. I had anticipated very low contrast due to the colour film, but not that low. So I turned up the contrast on the enlarger and tried again:

Tom Enlarged6

However, this just made the whites exceedingly white and the dark areas the exact opposite. it also made the grain of the shot really high. So I went back again and tried the lowest contrast:

Tom Enlarged5

Once again the image was just completely flat. So I tried the test strip at 4 seconds per exposure.

Tom Enlarged4

This was better, but still not brilliant. I decided to do the whole test strip at 10 seconds, since that was the best of a bad bunch.

Tom Enlarged3

This came out pretty much identical to all the others and I was about ready to give up when I realised the contrast was still down, so I turned it up again and did it again.

Tom Enlarged2

However, that did pretty much nothing different to the original test strip. So I picked 10 seconds for the exposure and tried enlarging the whole image to see if I just couldn’t see the contrast areas properly:

Tom Enlarged1

Still awful. This made me panic slightly as I now had no idea what to do. I moved forward with the attempts at ruining the film with alcohol, but it did absolutely nothing. There was a smudged area in the bottom left of the image, but I think that was already on the film and not due to the alcohol. So this left me with a choice; 1) I could carry on with the images and just accept the low quality and change my idea for damaging Tom’s film, or 2) I could get the images I liked printed at snappy snaps in colour and damage them instead.

Option 2.

Film Results

Film Results

Having shot my six sets of images I took the photos to be developed at Max Spielmann, because we don’t have a colour processor at the university. It was really risky shooting them on disposable cameras as I couldn’t control any of the settings to make sure my shots came out. So I just had to hope.

Luckily 5/6 films came out, but unfortunately George’s reel was too under exposed to see the images. I was a little disappointed, but I still had to first 5 to work with.

Emily Libby Sophie Suzie Tom George

Overall I was happy with the outcome of the first 5. Since I didn’t have time to reshoot and get my images developed again I decided to just move forward with the ones that worked. On the photos of Suzie there are a few light leaks, but I don’t think they’re due to the camera I shot them on as the rest of the film doesn’t have them on, so I’m guessing it occurred when the shop processed my film. I’m not so bothered about it though because my aim is to damage/distort the film anyway. My models did a brilliant job and now I have a clear idea of how I want to alter them.

I really enjoyed using disposable cameras for these images. It meant I was less focused on the technical side of what I was shooting and more focused on capturing the narrative within my shots. I think despite the fact that I didn’t alter the cameras in any way, the method was still the right one to use. Thinking back on it, I would have liked to experiment with the cameras as well as the film, so I think I will endeavour to do that in future. It was interesting shooting on colour as well, since I’m used to capturing black and white images, and I loved the results I got of this off green colour to them all. I don’t know whether that was to do with the brand of film or whether all disposable cameras come out that way, but I like it nonetheless. I’m looking forward to damaging these and seeing what results I get.

Shoot Logistics

Shoot Logistics

  Having conducted my research, I felt it was time I sorted out the logistics of how I wanted to shoot my images.

First: Locations

The location of where to shoot was important to me. I didn’t want it to look too recognisable as Coventry City Centre and I struggled to find somewhere outside of Coventry that I could shoot and get all my models to with ease. So I was left to try and find a few locations in Coventry that I could disguise as else where to the untrained eye. I knew it needed to be outside too, since I wanted them to be in a public setting in order to portray the identity they adopt when in such a situation.

I decided on three locations in the end:

Location 1: Hill Street.

Location 1

The small patch of green at the bottom of Hill street seemed like the perfect secluded area to shoot a few people. There were a couple of angles I was able to make use of and I think I managed to shoot the images so none of them looked similar.

Location 2: Priory St.

Location 2

This location was a little harder because I had the university square to contend with in the backdrop, so I had to stick to framing away from the university buildings. It was harder than the first location as there was less space to work with that wasn’t recognisable, but I think I managed to make it work.

Location 3: Cathedral lanes.

Location 3

I decided to shoot on the cobblestone lane between Godiva Square and the Cathedral because it was quieter, had the sort of backdrop I wanted, and I was able to pick a few different positions for shooting as there wasn’t so much that is recognisable in that area.

Second: Reasoning/Method

The second issue I had to sort out was how I wanted to shoot each person. For my preparation I asked each of my 6 models to tell me something physical that they felt represented their identity, as well as something they disliked about themselves. I got quite a range of responses.

Libby:

“Jewellery or make up represents my personality.”
“I don’t like my skin.”

Tom:

“I go out drinking an awful lot, so I guess alcohol?”
“I’d say that it’s one thing being good at football and squash, and being able to act and sing, but I really wish I could dance :(“

Suzie:

“My smoking.”
“I don’t like my stomach, but my hair is annoying sometimes too.”

Sophie:

“I do like food.”
“I don’t like that I have to wear my glasses to feel ‘normal’ or ‘myself’.”

George:

“My lighter maybe? It’s been awhile since I’ve brought it and used it.”
“Anxiousness. This. I want to get rid of this! And my spaghetti arms.”

Emily:

“I like that I am Creative/I like writing and books.”
“I have a massive nose and forehead.”

I found it really interesting the answers I got, as some people really struggled to come up with something that represented themselves, and easy to come up with a dislike, where as for some of them, it was the other way round. However, the answers they gave me were really helpful in working out how to shoot them all. For example, Sophie I will shoot closer to her face as her focus area is her glasses, whereas for Tom, it’ll be his whole body, since in dancing you use your whole body. It also works out well at giving me a range of options for the final images so they don’t all look too similar.

Now that I’ve worked these kinks out of my planning, I will be able to shoot much easier. One final thing I found though that has inspired my production of my idea was this quote:

“There is a certain way of being human that is my way. I am called upon to live my life in this way, and not in imitation of anyone else’s. But this gives a new importance to being true to myself. If I am not, I miss the point of my life, I miss what being human is for me. […] Being true to myself means being true to my own originality, and that is something only I can articulate and discover. In articulating it, I am also defining myself. I am realising a potentiality that is properly my own.” – Charles Taylor.
I felt it really captured what I’m trying to portray throughout my project and I will definitely keep it in mind when shooting and processing my images in post, as it will hopefully inspire me to create high quality images.